There are so many things going on around here I feel compelled to write about, thank goodness my sisters and I have a little “three-line” thing going back and forth to each other (I challenged them to do it with me inspired by this podcast back HERE…the one called “Life is a Poem” that I highly, highly recommend). We write down three lines each day…which are supposed to be short and maybe even a little poetic, which helps me keep my sanity in the record-keeping department.
And with a new puppy and extra kids there hasn’t been a lot of sanity over here. Tomorrow I’m going to try to write about it.
But I digress. Let’s get back to this “salve for your soul” business with the bread recipe.
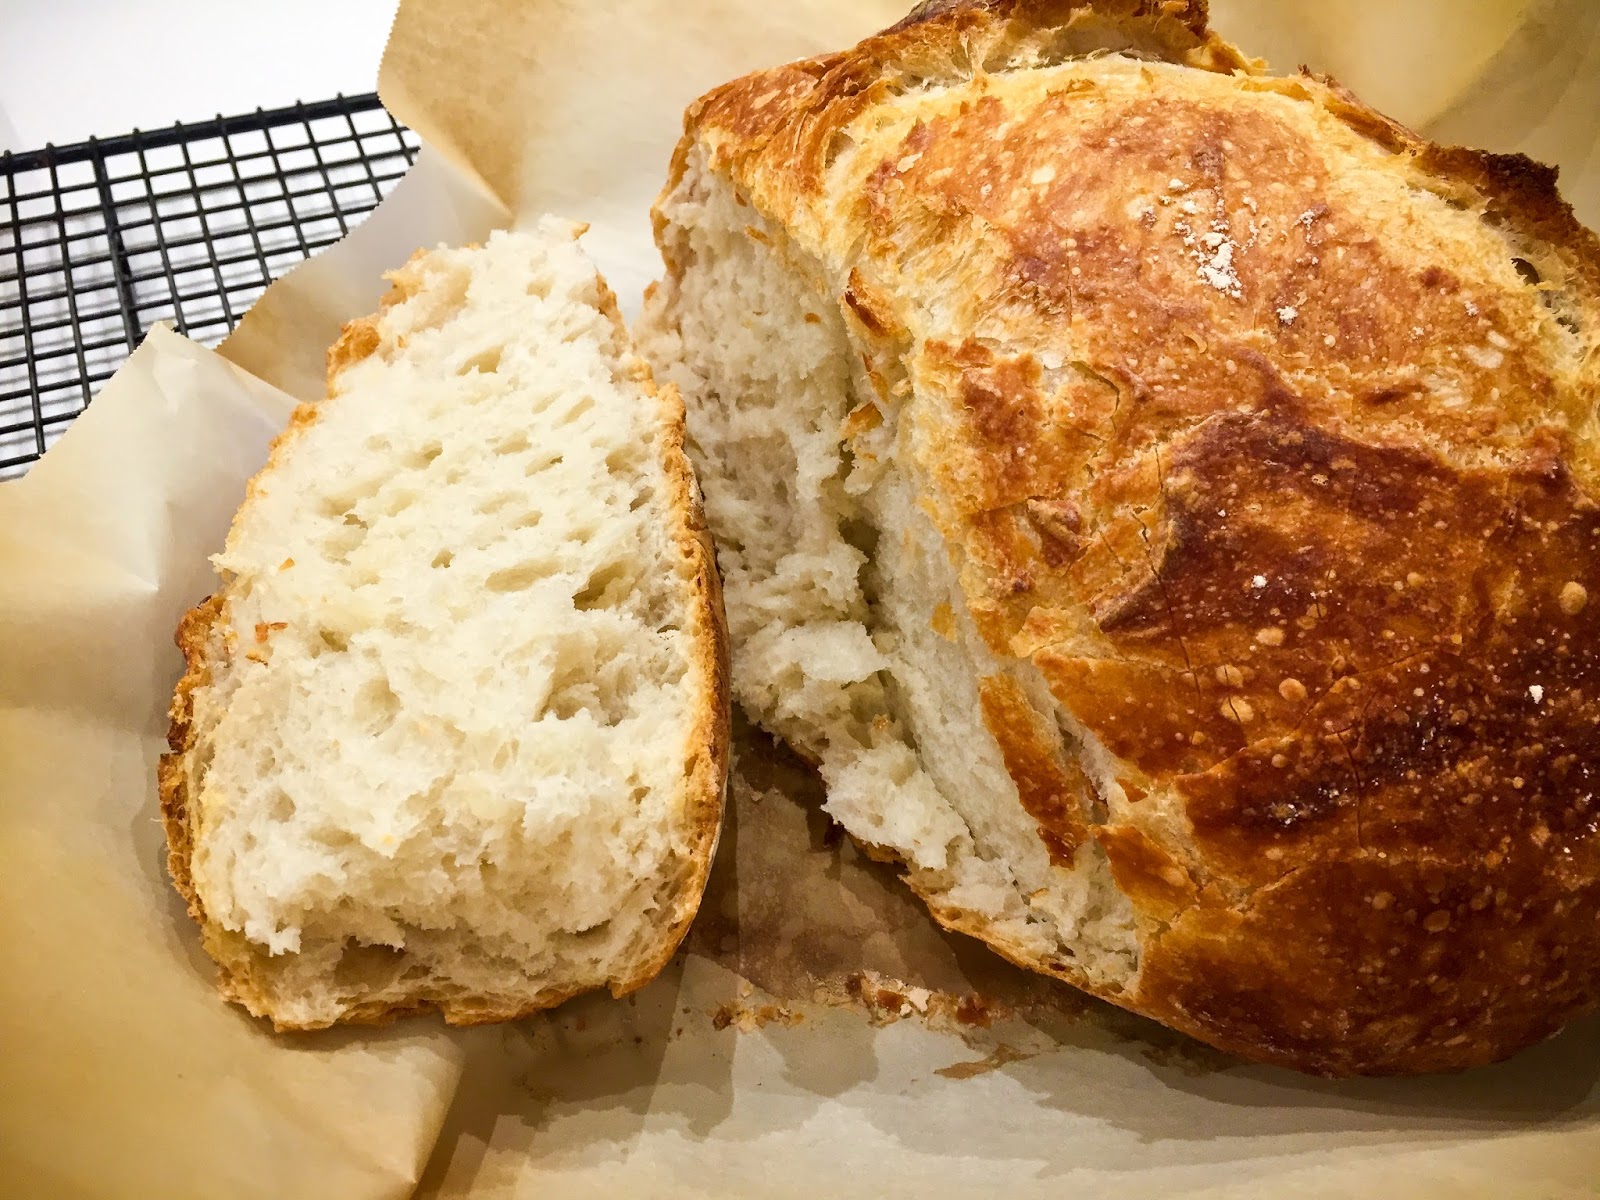
Because this stuff is magical.
Mmmmm. My mouth is watering.
Our friends from China who moved here made this for us one night a year or so ago and I kept meaning to get the recipe, but didn’t. He said it was a famous NYT recipe and I could find it easy, but I let life get in the way.
Then my sister made it for us when we visited Boston in December.
And guess what? I made it practically every single day for a week when we got home.
The deal is that it is SO EASY!!
But it looks so great you have to tell your kids to look quite a few times and exclaim, “I MADE THIS!!”
Home-Made Crusty Bread Recipe
So here we go. Easy peasy, but you have to be patient because you have to make the dough the day before and let it sit.
You also have to have a dutch oven enamel pot. And those tend to be a little pricey. Unless you find one at Marshall’s for a steal of a deal. I know they sell them on Amazon too.
The original recipe that was published in the New York Times, but I liked this explanation and a couple tweaks a little better.
It’s not as fussy as I thought it would be (the directions make it seem fussy but it’s so easy once you get what you’re doing), and is generally fool-proof.
Home-Made Crusty Bread
Ingredients
- 3 c. flour
- 1/4 tsp. yeast
- 1 1/2 tsp. salt
- 1 1/2 c. water
Instructions
- THAT IS IT!
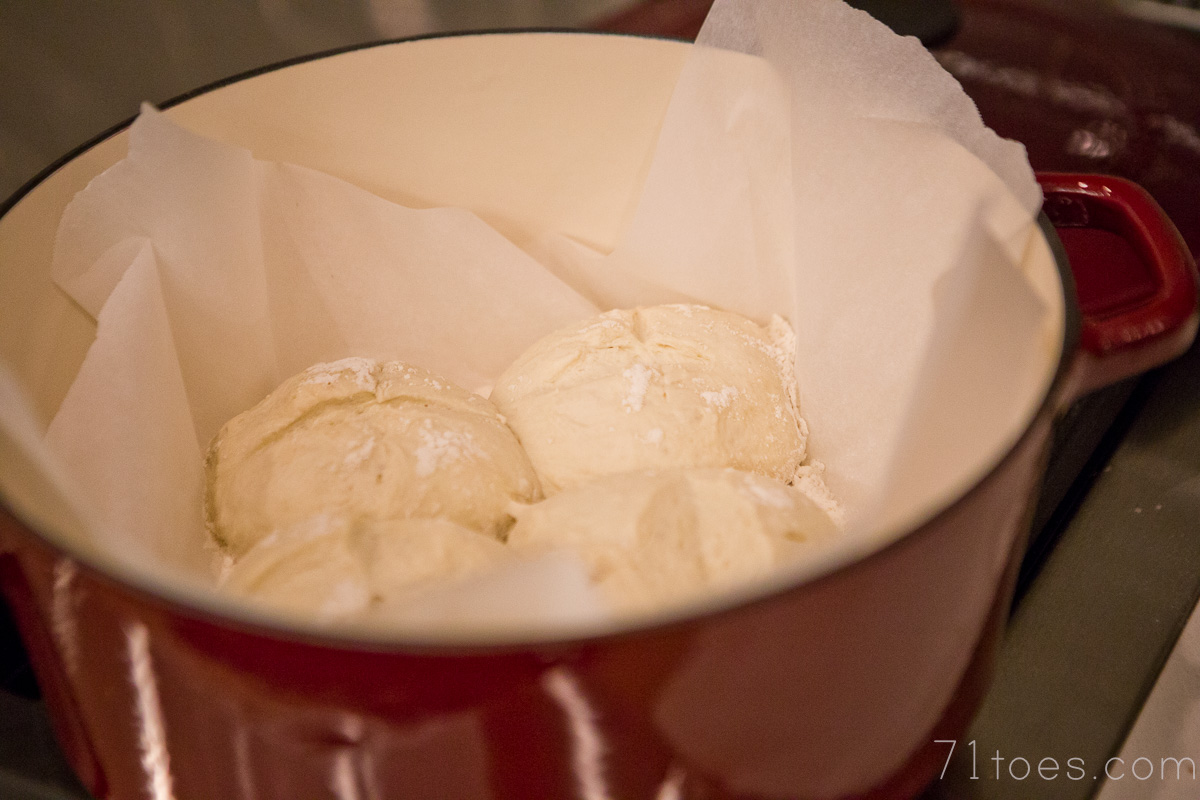
- The mixture will still be kind of dry and flakey and that's ok. Cover with saran wrap and leave for 12-24 hours. Just right on the counter (don't refrigerate). Most of the times I've baked this I made mixed the ingredients the night before, and it was ready to bake for dinner the next night. One time I left the dough for almost two days and it was still really good, just more of a sourdough taste.
- When you're ready to bake put your empty pot (with lid on) in your oven and turn it on to 450 degrees. (You want the pot to heat up in the oven so it's ready to bake that bread from the inside when you're ready.)
- While the oven heats, take out the dough, mix it for a minute, and set it on a floured piece of parchment paper, covered with the saran wrap. It should sit for about 30 min. The recipe HERE gives instructions on how to make cuts in the top if you want it to look extra fancy.
- After the oven and pot are all hot and ready, carefully take out the pot (it will be super hot), and put the parchment with dough on it into the pot. (BE SO CAREFUL not to forget that the lid is super hot!...I almost grabbed it one time and that would be bad.)
- Put the lid back on and stick it in the oven.
- Bake for 28 minutes, then take off the lid and bake to brown it up for another 12-15 min.
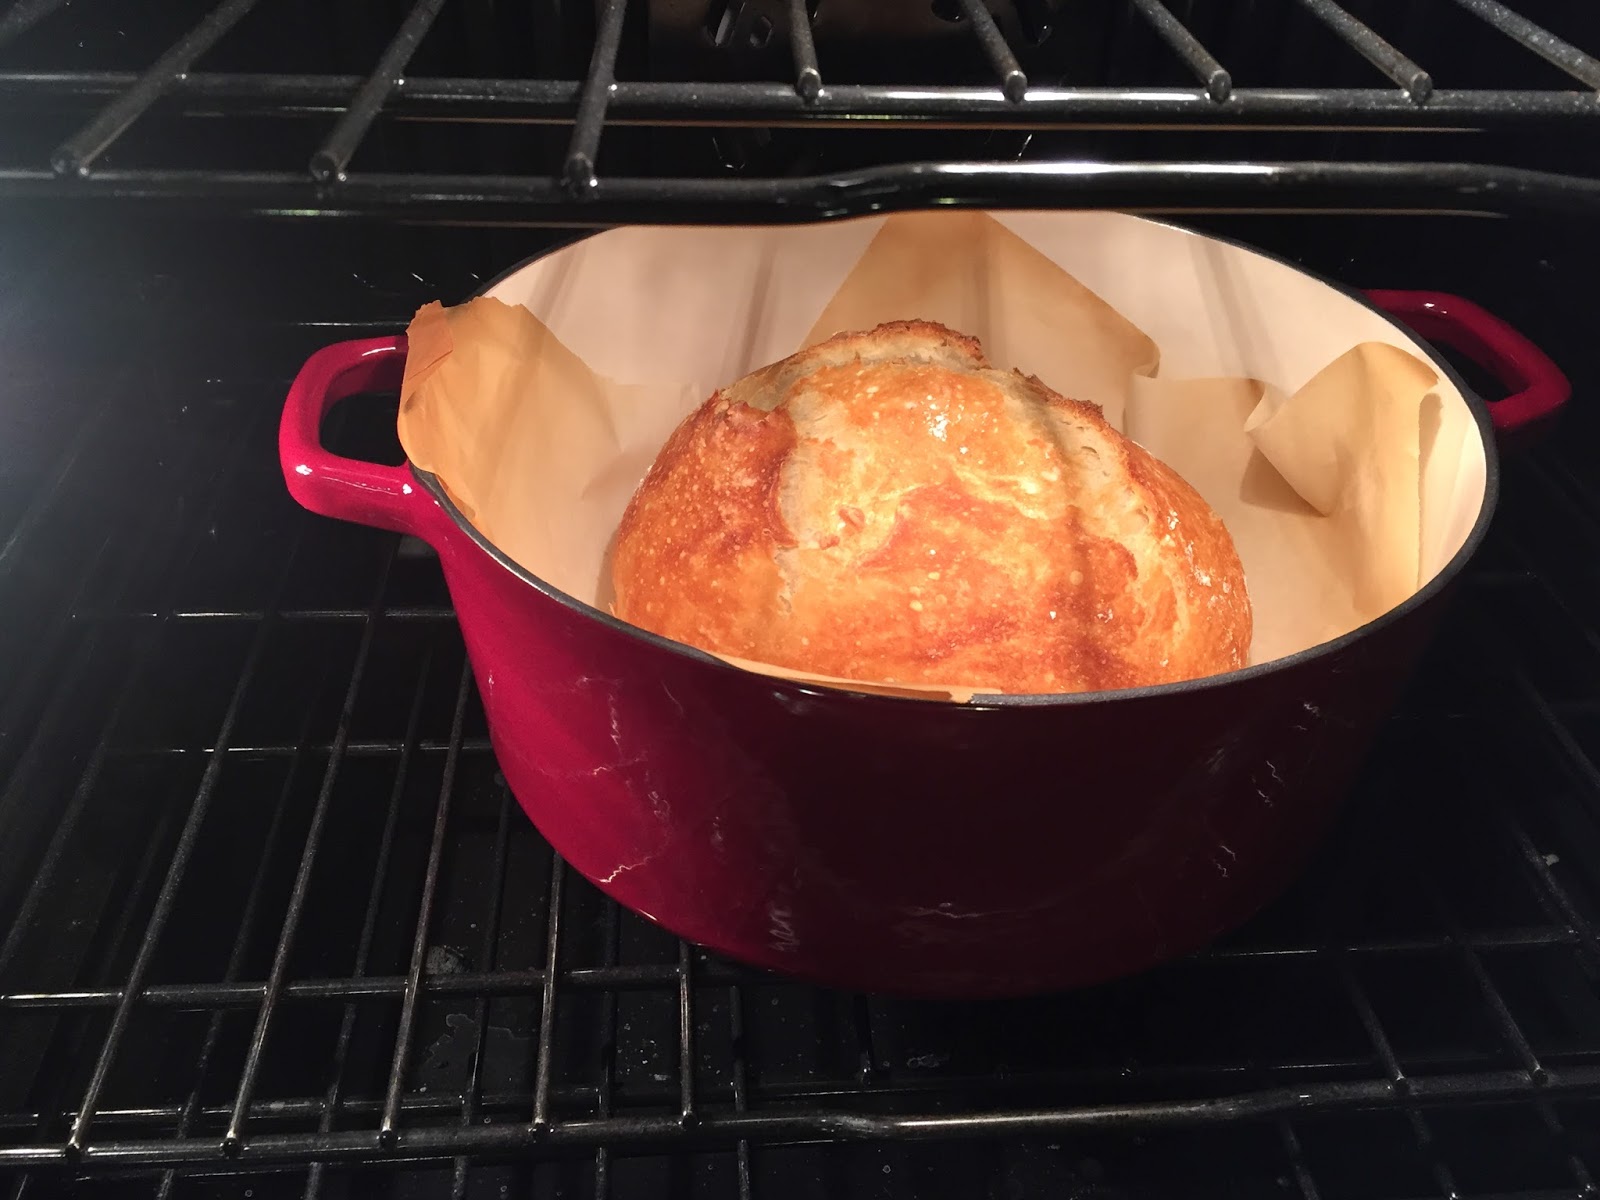
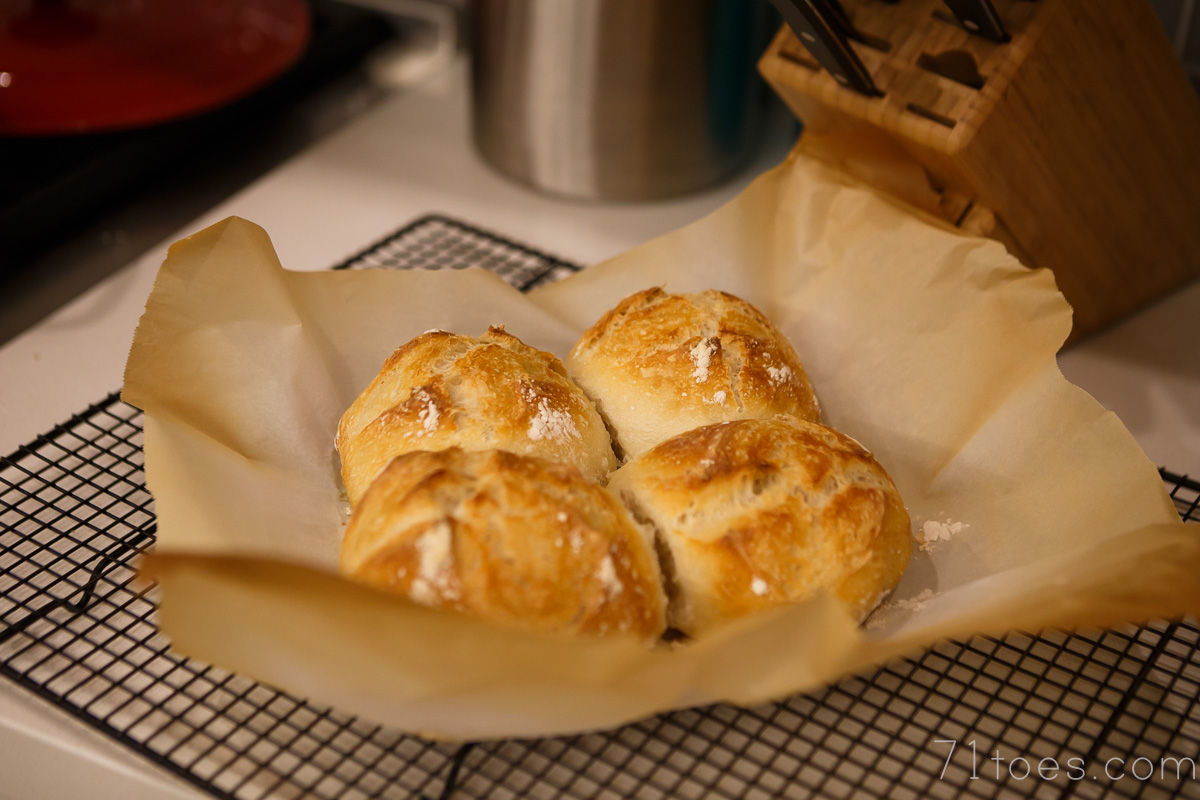
- Take it out of the oven and remove from the pot on a cooling rack.
- Serve with whatever you want...I love it with olive oil with seasonings mixed in.
But first, a variation option:

I make this bread often, too. I don't have the enamel Dutch oven. I just use a round cake pan and cover with foil for the first part of the baking. It works great!
Good to know! I have a cast iron skillet and I'm wondering if that will work if I put foil over it.
Oh awesome, that is great to know!
This is my family's favorite bread. They'd be happy to eat it every day for the rest of their lives:) I love the top of putting it on parchment. I've had a few funny shaped loaves because I put it on my silpat and then try to scrape it off to put it in the hot pan. It doesn't always work well;) I think I'll mix some up right now.
Do you leave the dough on the side or put it in the fridge for the 12-24 hours?
Just on the counter. Or in a cabinet if you don't want it sitting around….but don't forget about it! 🙂
I make mine in my old black lodge dutch oven and it works great too!
For the small ones, do you think it would make a good bread bowl if you cut the top off? It looks like it would be "sturdy" enough to put soup in it but I haven't made that type of bread in a long time and I can't remember!
Yes I do think it would work for that!
I made these tonight for dinner, during this whole COVID-19 break, for my husband and 5 kids. Everybody loved it. Thank you so much Shawni